Hobbycraft Canada (“HC”) upholds the ‘Canada’ part of their name by continuing to provide an injection-moulded model of that famous Canadian aircraft, the ‘Avro Arrow’, in 1:72 (the one true) scale. This ‘new-tool’ kit is the third 1:72 Arrow that HC has offered.
The first HC version of the Arrow had a major error which was eventually fixed to create the second version. It is reported that the ‘tool’ for this second version was damaged by the company that does the moulding. So, this third, ‘new-tool’, mould was created.


A friend has built the first HC Arrow, I’m building the second Arrow, and the same friend recently bought the just-released third Arrow kit. We got together a while ago to compare the three kits and take pictures.
Type History: The Arrow was to be the next Canadian fighter after the Avro Canada CF-100 Canuck ( the ‘Clunk’). The Arrow was to have a very sophisticated ground control & automatic pilot system (to work within the ‘Semi-Automatic Ground Environment” (SAGE) of NORAD), new Canadian-designed (& built) engines (the Orenda Iroquois), and an advanced missile armament. In the early design stages, Avro Canada hoped to sell craft to the United States of America and to the United Kingdom. However, this was not to be. After the completion of five (Mark I) prototype/pre-production aircraft and one (Mark II) production craft, the project was shut down by the government and all the planes were destroyed. The nose section (and main landing gear leg) of RL-206 (the Mark II) were retained for pressurization tests and now reside in the National Air & Space Museum (in Ottawa).

![]()
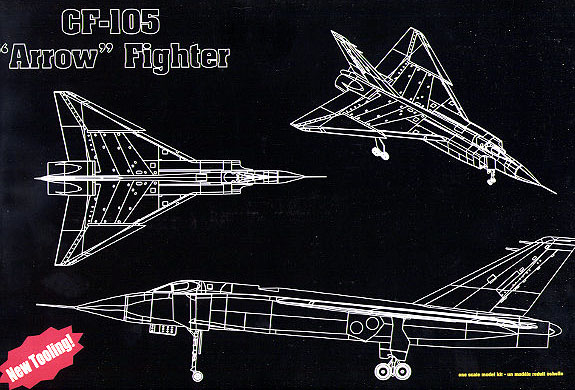
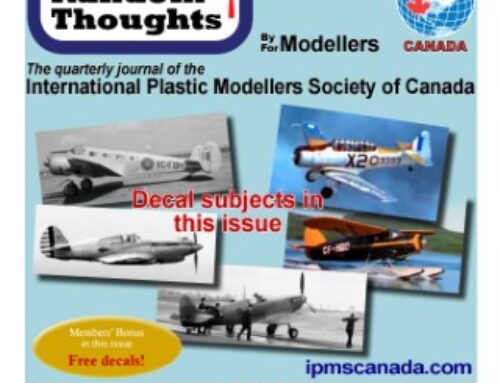
RAF Flying Review ‘Scale-Plan’ from Vol: XIV #6
Instead of the Arrow, the RCAF got the McDonnell CF-101 Voodoo (actually rejected before the Cancellation) (with the AIR-2 (ex-MB.1) Genie nuclear missile) and the Boeing CIM-10 Bomarc (or F-99 (USAF) and later the IM-99). The nuclear armament for both of these types was never fully available for service. The RCAF also got the Lockheed/Canadair CF-104 (F-104G) Starfighter and the Northrop/Canadair CF-116 (F-5A) Freedom Fighter.
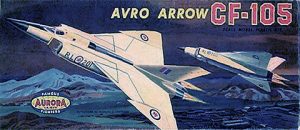
Other Kits: The first kit was an Aurora product (at approximately 1:78) which I built in the 1968/69 period (and other than photographic proof that I did have it, I don’t remember anything about it – it certainly looked like an Arrow).

In 1:72 vacuum-form, kits were produced by VP (Victoria Products) (from 1986) and Astra (in 1982).
As well, HC increased the size of their 1:72 kit to produce a 1:48 version. Northstar/ Military Hobbies (Mississauga, ON) produced a resin cockpit for this 1:48 model.
R. Kyle Schmidt has a ‘thing’ about the Arrow and has created and maintained a web-site on the aircraft (www.avro-arrow.org). Bill Zuk wrote a discussion called ‘Modelling the Avro Arrow’ (originally created in 1996 with additions and some edits since (assisted by R. Kyle Schmidt – http://www.avro-arrow.org/Arrow/models.html )) where he outlines some of the problems in building the four “1:72” kits available at the time. He builds the ‘second’ HC Arrow and notes the major error in the ‘first’ HC Arrow. Please read this article if you want information on the ‘non-HC’ kits.
HC Arrow kits #1 & #2: The instructions for Kit #1 are copyright 1987, but the kit probably dates from 1986. This is a basic aircraft model with only one choice – whether to have the gear up or down (and if the gear is up, you have to supply the base and attachment).
The gear legs are very simple with minimal detail and brake lines etc would have to be added. All control surfaces are moulded fixed at neutral as part of the surrounding empennage. The speed brakes are also moulded closed.
The cockpit is minimal with two figures, two seats, and a bit of floor, but you won’t see much inside when the canopy is painted. The canopy is one piece and a vacuum-formed replacement would have to be made if you wanted to open up the cockpit. By the way, the operable canopy is two parts (pilot & radar operator) and of a ‘clam-shell’ design. It is split down the centre-line and hinged at the bottom.
The backs of the splitter plates at the intakes are hollow (and should be filled) and the intakes between the main fuselage and the splitter plates are not modelled. The engine exhaust is moulded as two cylinders projecting a short way from recesses in the surrounding structure.
The big error in Kit #1 was that the aileron actuators were modelled on the upper surface of the wing, rather than the lower surface. This was corrected to create Kit #2. Otherwise, kit #1 and #2 are the same.
 |
 |
 HC Arrow kit #3: This is a new kit from 2011.
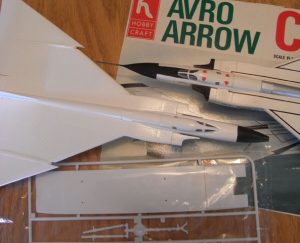
What do you get in the box? There are some very good things, but there are a few problems.
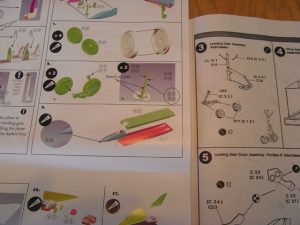
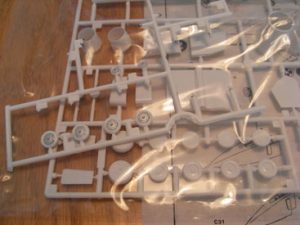
The good things for starters: each sprue is in its own plastic (non-resealable) bag. The instructions are in colour to show how parts fit together.
The new model has greatly increased detail in the cockpit so that you have a nearly complete interior with decals for the panel faces.

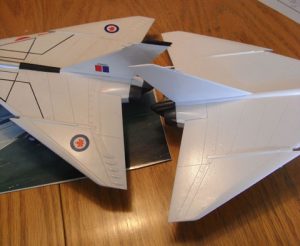
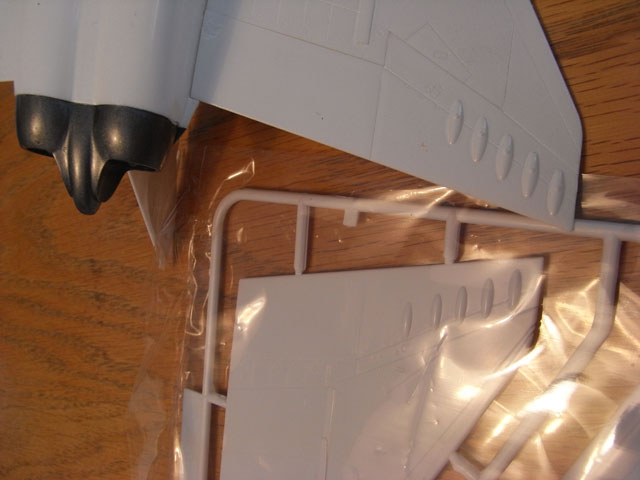
There is more detail to the engine exhausts with a face and inner and outer cylinders . You can also see that the airbrakes are positionable. The rest of the control surfaces are still fixed at neutral.
The landing gear has more bits to glue together and includes 2-piece wheels which are better than the one-piece wheels of the previous kit.
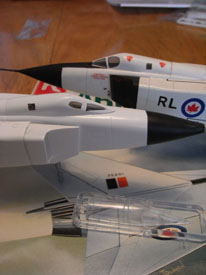
There may also be a slightly better shape to the fuselage just behind the inlets where the supersonic ‘area rule’ was used to define the cross-section of the aircraft. There is also some improvement in the inlets.

 Now the bad things. You still get a one-piece canopy so you won’t be able to see much of the detail inside the cockpit after painting. You’ll need to make some vacuum-, or smash-, formed replacements to open up the canopy. The canopy does have better indications of the windows and the edges of the movable parts.
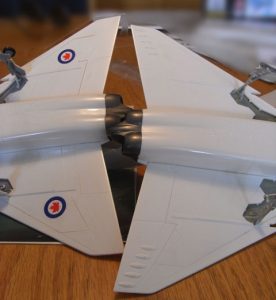
The aileron actuators are on the bottom of the wing, but they stray off the line of ailerons which is an error
There is a significant problem in the main landing gear. The bogies (parts D6 & D7 in Step 8 ) that hold the two wheels on the legs should be ‘mirror images’. However, they are the same. You will need to cut off the control arm on one and glue it to the other end of the bogie. The main gear will not work unless this is done.
The instructions have switched two sprue letter identifiers so you will have to look over the instructions carefully before you start to get this problem corrected.
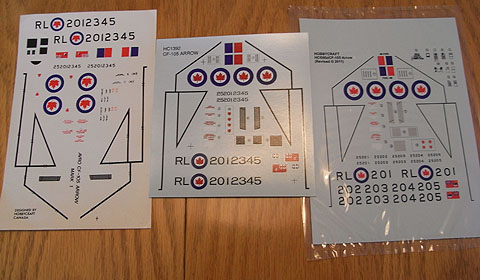
The decals are pretty much the same as before with the added pieces to go in the cockpit – the new decals are on the right, the centre set is from my #2 kit, the left set is from an earlier HC set (and has some problems)). The Canadian ensigns in the new decals have problems, but the font for the identifier codes, especially the numbers, is better than the one used on the 2nd kit.
Except for the main gear bogies (which have to be fixed), the kit should assemble into a good replica of the aircraft. The error in the aileron actuators can be ignored by all but the most advanced sufferers of AMS. To show off the more detailed cockpit and raise the result up a notch, you’ll have to make up an opened canopy.
The leading edge of the wing would be very difficult to get right in a vacu-form kit (if you can get one), so this kit seems to be the best game in town.
Fred Hutcheson
2012 August
